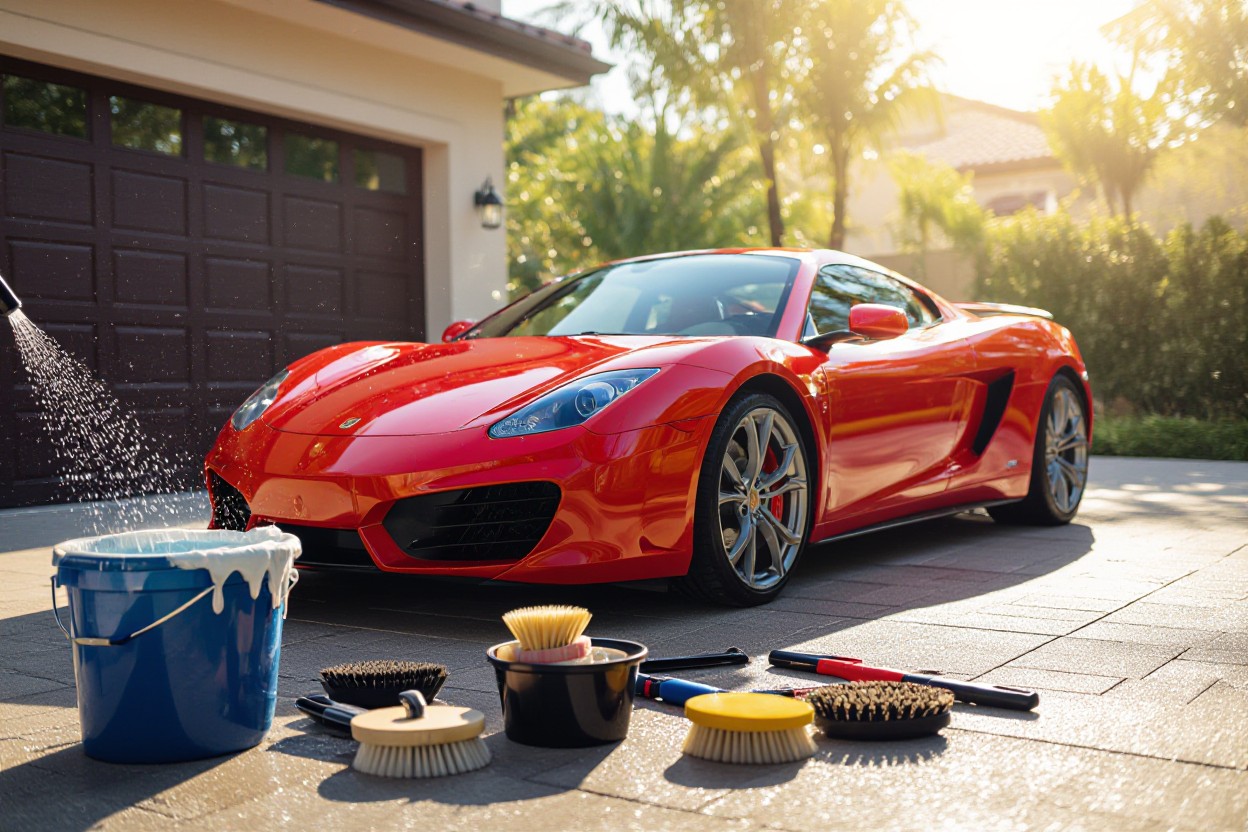
Affordable Car Detailing Santa Rosa
Are you looking for more info about Car Detailing Cost Santa Rosa?
Want to know more about Santa Rosa car wash and detailing?
You are in the right place when it comes to Santa Rosa car interior cleaning and Santa Rosa auto detailing near me...
Santa Rosa Car Detailing
Car Detailing Cost Santa Rosa
Learn More About Santa Rosa auto detailing near me
🚗✨ Get Your Car Looking Brand New Today! ✨🚗
Call or Text Now: (707)636-4518
👉 Limited-Time Offer: $10 OFF Your First Full Detail! (Use Code: VALUE10 at checkout.)
Why Choose Us?
✅ Santa Rosa and Rohnert Park Top-Rated Detailing Service
✅ Mobile and friendly service
✅ Eco-Friendly Products & Premium Results
✅ Se habla Español
Don’t Wait—Spots Fill Fast! ⏳ Click, Call, or Message NOW!
Santa Rosa car wash and detailing
Looking for Car Detailing Santa Rosa Experts?
Perhaps You Are Searching Everywhere For...
- Affordable Car Detailing Santa Rosa
- Car Detailing Cost Santa Rosa
- Santa Rosa auto detailing near me
- Santa Rosa car wash and detailing
- Santa Rosa car interior cleaning
Your Search is Over!

Santa Rosa Car Detailing FAQ

Santa Rosa Car Detailing
QUESTIONS ANSWERED...
How much does car detailing cost in Santa Rosa?
Answer...
Answer: Prices vary based on service level (basic, full, premium) and vehicle size. In Santa Rosa, expect:
Basic Wash & Vacuum: $50–$100
-
Full Interior/Exterior Detailing: $150–$300
-
Ceramic Coating: $500–$2,000+

What’s included in a full car detailing service?
Answer...
Answer: A full detail typically covers:
-
Exterior: Hand wash, clay bar, wax/sealant, wheel/tire cleaning.
-
Interior: Vacuum, steam cleaning, leather conditioning, window cleaning.
-
Extras: Odor removal, engine bay cleaning (optional).
Learn More About Santa Rosa Car Detailing
Car Detailing Cost Santa Rosa TIPS...
Car Detailing Tips
There's nothing quite like the satisfaction of seeing your car shine like new after a thorough detailing session. Whether you're a first-time detailer or looking to enhance your skills, proper car detailing can protect your investment and maintain your vehicle's value. You'll discover that with the right techniques and tools, you can achieve professional-level results at home, saving both time and money. From washing and waxing to interior deep cleaning, these practical tips will help you transform your car into a head-turning masterpiece.
Key Takeaways:
- Always work from top to bottom when detailing your car, starting with the roof and ending at the wheels, to prevent re-contaminating already cleaned areas
- Use separate cleaning tools and microfiber towels for different areas (interior, exterior, wheels) to avoid cross-contamination and potential scratching
- Pre-wash your vehicle before any contact washing to remove loose debris and minimize the risk of paint swirls and scratches during the detailing process
Secrets of a Gleaming Finish
The difference between a clean car and a show-stopping finish lies in understanding how light interacts with your vehicle's paint. Professional detailers achieve that mirror-like reflection by working with multiple layers of protection and ensuring each layer is perfectly applied. Your paint's clarity directly impacts how sunlight bounces off the surface, creating that sought-after deep, wet look.
The Power of Paint Correction
Paint correction transforms your vehicle's appearance by removing microscopic imperfections from the clear coat. Using a dual-action polisher with varying pad densities and compounds, you can eliminate up to 90% of surface scratches, swirl marks, and oxidation. Start with a test spot in a small, inconspicuous area to determine which combination of pads and products works best for your specific paint condition.
The process typically requires multiple passes, working from more aggressive to finer compounds. Moving the polisher at a steady 1-2 inches per second prevents heat buildup that could damage your paint. Between each step, wipe the surface with an IPA (Isopropyl Alcohol) solution to reveal the true condition of your progress.
Choosing the Right Wax for Your Vehicle
Natural carnauba wax creates an unmatched warm glow but typically lasts 2-3 months, while synthetic sealants provide up to 12 months of protection. Your local climate should guide your choice - carnauba excels in moderate weather, while synthetic sealants better withstand extreme temperatures and harsh conditions. Dark-colored vehicles particularly benefit from carnauba's depth-enhancing properties.
Modern ceramic-infused waxes offer a middle ground, combining the warm aesthetics of carnauba with improved durability. These hybrid formulations can protect your paint for 6-8 months while maintaining that coveted deep shine. Apply thin, even layers using a foam applicator, and allow each coat to cure fully before adding another.
Temperature plays a vital role in wax application - working in direct sunlight or temperatures above 80°F can cause the product to dry too quickly and become difficult to remove. Schedule your waxing sessions for early morning or late afternoon, and work in small 2x2 foot sections to maintain control over the process. Two thin layers of wax provide better protection than one thick coat, and allowing 24 hours between applications maximizes bonding to your paint's surface.
Tools of the Trade: Must-Haves for Every Detailer
Essential Equipment You Didn't Know You Needed
Beyond the obvious microfiber towels and wash mitts, your detailing arsenal should include specialized tools that make a dramatic difference. A clay bar kit removes embedded contaminants that regular washing can't touch, while a proper set of detailing brushes helps you reach tight spots around emblems and grilles. Professional-grade foam cannons attach to your pressure washer and create thick, clingy suds that lift dirt without scratching your paint.
Consider adding a dual-action polisher to your collection - it's far more efficient than hand-polishing and reduces the risk of burning through clear coat. LED inspection lights reveal swirl marks and paint imperfections you'd otherwise miss, while a set of proper drying towels (at least 1100 GSM) prevents water spots and marring during the final steps.
Finding the Best Products for Your Car's Needs
Your vehicle's specific needs should guide your product choices. Soft-paint Japanese cars require gentler compounds than hard-paint German vehicles. pH-neutral shampoos preserve your car's protective coatings, while dedicated wheel cleaners match your wheel's finish - what works for painted wheels might damage polished aluminum.
Test products on a small, inconspicuous area first - especially when trying new compounds or chemicals. High-quality products might cost more upfront, but they're more concentrated, last longer, and deliver superior results. Your local climate also affects product selection - humid environments need different protection than dry, hot regions.
Build your detailing kit gradually, starting with the basics and adding specialized products as you gain experience. Many detailers swear by certain brands, but the truth is that most major manufacturers offer quality options. Focus on products that match your specific goals - whether that's maximum shine, long-term protection, or ease of maintenance. Reading product labels for specific chemical compositions helps you avoid redundant purchases and ensures compatibility between different products in your arsenal.
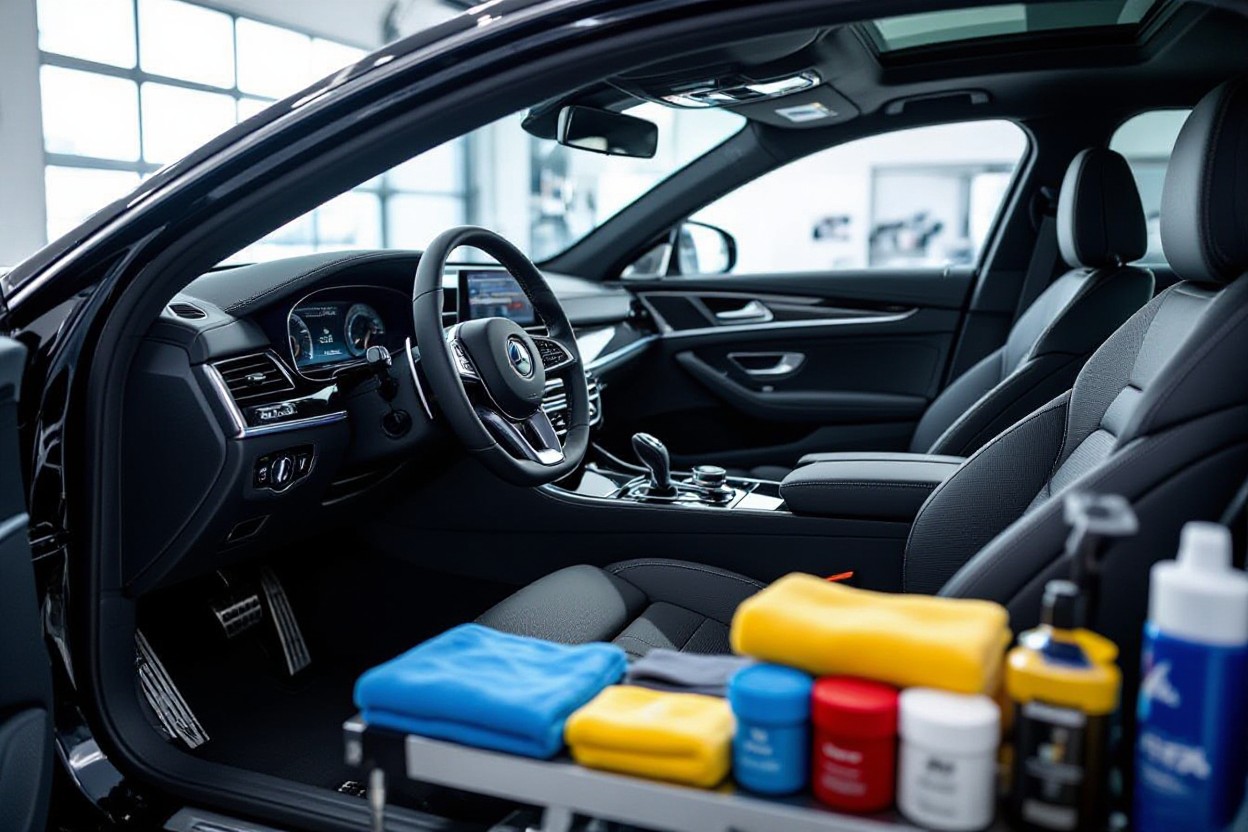
The Art of Interior Details
Your car's interior deserves the same meticulous attention as its exterior, since you spend most of your time inside the vehicle. A properly detailed interior not only looks fantastic but also creates a healthier driving environment by removing accumulated dirt, bacteria, and allergens that build up over time.
Techniques for Upholstery and Carpet Cleaning
Start by thoroughly vacuuming all fabric surfaces using crevice tools to reach deep between seats and corners. For stubborn stains on upholstery, apply a specialized fabric cleaner and gently agitate with a soft-bristled brush using circular motions. Allow the cleaner to dwell for 3-5 minutes before blotting - never rub - with a clean microfiber towel.
For carpets, use a drill brush attachment to deep clean without damaging the fibers. Spray carpet cleaner in small sections, scrub gently, then extract with a wet vacuum. This method pulls embedded dirt from deep within the carpet instead of just cleaning the surface. For particularly soiled areas, you might need to repeat the process 2-3 times.
Reviving Dashboard and Trim Materials
Your dashboard and trim require specific cleaners based on their material - vinyl, leather, or plastic. Apply a UV-protective dressing to prevent cracking and fading, working it into the surface with an applicator pad. Avoid silicone-based products as they can create glare and attract dust.
Clean air vents with a small detailing brush and compressed air to remove dust without scratching delicate surfaces. For touch screens and gauge clusters, use an electronics-safe cleaner and microfiber cloth to prevent streaking. Never spray cleaners directly onto electronic components - always apply to your cloth first.
Tackle door jambs and sills with an all-purpose cleaner and detail brush to remove built-up grime. These often-overlooked areas can make a dramatic difference in your interior's overall appearance. Use plastic trim restorer on faded or discolored pieces to bring back their original color and protect them from future UV damage.
Protecting Your Investment: Maintenance Strategies
Regular Practices to Extend Vehicle Life
Following a consistent maintenance schedule transforms your vehicle from a simple means of transport into a long-lasting investment. Start by checking your tire pressure weekly - properly inflated tires can improve fuel efficiency by up to 3.3% and significantly extend tire life. Stick to manufacturer-recommended oil change intervals, typically between 5,000 to 7,500 miles for modern vehicles, and always use the specified grade of oil for your engine.
Make a habit of inspecting your brake pads monthly and listen for any unusual sounds while driving. Replace wiper blades every 6-12 months to maintain clear visibility, and regularly check all fluid levels - including coolant, brake fluid, and power steering fluid. These simple practices can prevent costly repairs and help maintain your car's resale value.
Seasonal Considerations for Car Care
Your car faces different challenges as seasons change. During summer, protect your paint from intense UV rays with a quality wax coating, and ensure your cooling system is functioning optimally. Winter demands additional undercarriage protection against road salt and regular washing to prevent corrosion. Spring and fall are ideal times for thorough inspections and addressing any issues that developed during extreme weather conditions.
Consider switching to season-specific tires for optimal performance and safety. Summer tires provide better grip on hot pavement, while winter tires offer superior traction in temperatures below 45°F. Additionally, your battery capacity can drop by up to 50% in cold weather, making regular battery testing crucial during winter months.
Each season also requires adjusting your cleaning routine. Summer calls for more frequent exterior washes to remove bug residue and tree sap, while winter demands extra attention to wheel wells and undercarriage rinsing. Apply a hydrophobic glass treatment before rainy seasons to improve visibility, and consider using a paint sealant for enhanced protection during harsh weather conditions.
Common Pitfalls That Sabotage Your Efforts
Mistakes Even Experienced Detailers Make
Many seasoned detailers fall into the trap of using the same towel for multiple surfaces, unknowingly transferring contaminants from one area to another. Cross-contamination can lead to micro-scratches and swirl marks that become visible under direct sunlight. Another frequent mistake is rushing through the drying process - using only one drying towel instead of multiple clean ones can drag dirt particles across your paint's surface.
Working in direct sunlight or on hot surfaces ranks among the top errors that can ruin your detailing work. Heat causes cleaning products to dry too quickly, leaving behind stubborn water spots and product residue. The ideal temperature for detailing ranges between 55-75°F, and finding a shaded area will significantly improve your results.
How to Avoid Costly Overlooked Areas
The most commonly missed spots during detailing include door jambs, trunk gutters, and the area behind fuel doors. These hidden spaces collect road grime and moisture that can lead to premature rusting and deterioration. Your wheel wells also deserve special attention - neglecting these areas allows brake dust and road salt to accumulate, potentially causing long-term damage to your vehicle's undercarriage.
Door seals and rubber trim often get overlooked during the protection phase of detailing. These components can dry out and crack without proper treatment, leading to water leaks and wind noise. Apply a specialized rubber protectant every 3-4 months to maintain their flexibility and prevent premature aging. Additionally, don't forget to clean and protect your headlight lenses - oxidation can reduce visibility by up to 40% if left untreated.
Summing up
Considering all points, maintaining your car's pristine condition through proper detailing doesn't have to be overwhelming. You can achieve professional-looking results by following these systematic steps, from using the right cleaning products to paying attention to often-overlooked areas. Your dedication to regular maintenance and careful attention to both interior and exterior details will keep your vehicle looking showroom-fresh.
By incorporating these detailing tips into your car care routine, you'll not only preserve your vehicle's appearance but also protect your investment for years to come. Whether you're planning to sell your car in the future or simply want to enjoy driving a spotless vehicle, these techniques will help you achieve the results you desire. Just take it one step at a time, and you'll soon master the art of car detailing.
FAQ
Q: What's the correct order to wash a car for the best results?
A: Start by rinsing the entire vehicle to remove loose debris. Then wash from top to bottom using two buckets - one with soap solution and another with clean water for rinsing your mitt. Clean wheels last as they're typically the dirtiest part. Dry with a microfiber towel immediately to prevent water spots, and finish with a spray wax or sealant for added protection.
Q: How often should I detail my car's interior?
A: A thorough interior detailing should be done every 3-4 months to maintain cleanliness and prevent permanent staining or damage. Weekly vacuum sessions and monthly wipe-downs of surfaces with appropriate cleaners will help maintain the interior between deep cleaning sessions. Pay special attention to high-touch areas like steering wheels, door handles, and control buttons.
Q: What tools and products are vital for basic car detailing?
A: The basic toolkit should include microfiber towels (multiple for different uses), a wash mitt, car-specific soap (avoid household cleaners), wheel brushes, a vacuum with attachments, glass cleaner, interior cleaner, and a paint sealant or wax. Also invest in two wash buckets with grit guards to prevent scratching, and a proper drying towel to avoid water spots and swirl marks.
CONTACT Seekma Car Detailer
Seekma Car Detailer
730 2nd St
Santa Rosa California 95404
Call or Text Now: (707)636-4518
👉 Limited-Time Offer: $10 OFF Your First Full Detail! (Use Code: VALUE10 at checkout.)
✅ Santa Rosa and Rohnert Park Top-Rated Detailing Service
✅ Mobile and friendly service
✅ Eco-Friendly Products & Premium Results
✅ Se habla Español
Don’t Wait—Spots Fill Fast! ⏳ Click, Call, or Message NOW!
